



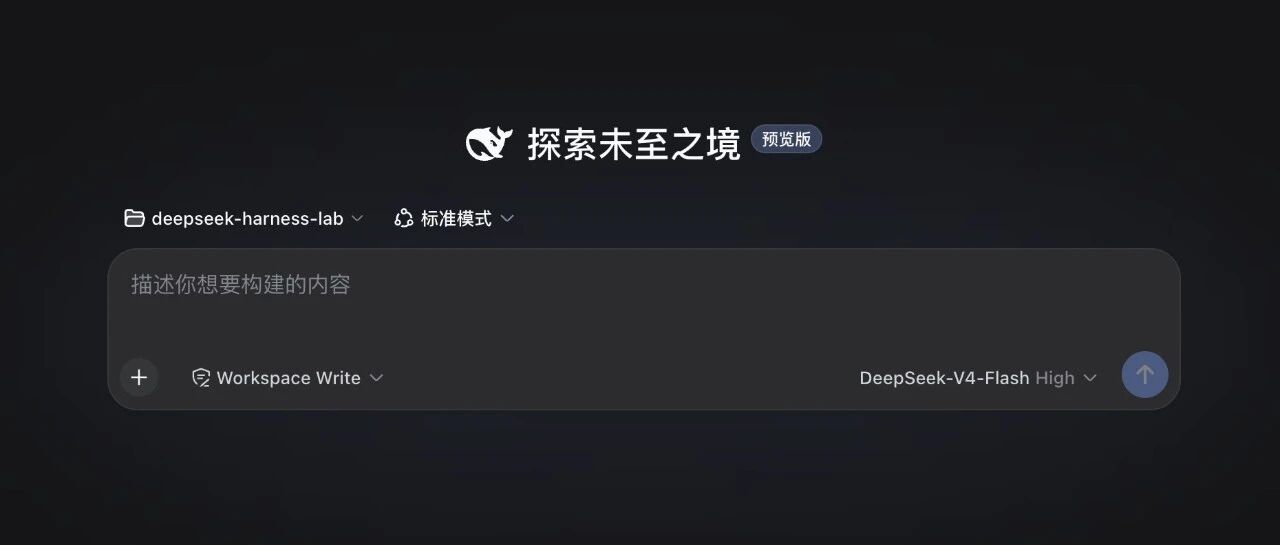
本文记录一次真实可用的部署过程:把 DeepSeek Harness 运行在 Linux 服务器上,通过
socat暴露给家庭局域网,并处理模型配置页遇到的crypto.randomUUID和 HTTP 403 问题。DeepSeek Harness 仍处于 Developer Preview,内部文件和安全策略可能随版本变化。本文使用
@deepseek-ai/dsh 0.1.0-rc.6验证通过。
先说安全问题
DeepSeek Harness 不是普通的聊天网页。它是一个 Coding Agent,默认带有 Shell、文件读写、工作区管理等能力。拿到网页访问权限的人,实际上也可能拿到服务器上对应用户的命令执行能力。
官方因此做了两层限制:
- Web 服务默认只监听
127.0.0.1,而且 CLI 会拒绝--host 0.0.0.0。 - 设置、凭据和模型发现等管理接口只允许 localhost 调用。即使配置了
--trusted-host,从局域网访问这些接口仍会返回 HTTP 403。
本文会修改第二层限制,让可信局域网地址能够管理模型和凭据。这适合个人家庭网络或隔离的实验网络,不适合公网、公司共享网络、宿舍网络或其他不受控环境。
不要在路由器上把本文使用的端口映射到公网。
如果你只想安全使用,不想改源码,最稳妥的方式仍然是 SSH 隧道:
ssh -N -L 3080:127.0.0.1:3080 LINUX_USERNAME@LAN_IP_ADDRESS然后在本机打开http://127.0.0.1:3080。下面的内容针对“我明确想从局域网 IP 直接访问”的场景。
环境和目录规划
本文统一使用占位符,不包含作者本人的用户名或局域网地址。读者部署时按自己的环境替换:
LINUX_USERNAME:服务器上的 Linux 用户名,例如dshuserLAN_IP_ADDRESS:服务器的局域网 IPv4 地址,例如192.168.x.xLAN_CIDR:允许访问的家庭局域网网段,例如192.168.x.0/24
其他环境要求:
- 服务器系统:Linux,使用 systemd
- Node.js:22.19 或更高版本
- 包管理器:pnpm,通过 Corepack 调用
- Harness 本地监听:
127.0.0.1:3080 - 局域网入口:
LAN_IP_ADDRESS:3080
为了后面的命令更清楚,可以先定义变量:
export DSH_USER="$(whoami)"
export DSH_LAN_IP="请填写服务器局域网IP"
export DSH_PORT="3080"
export DSH_DEPLOY_HOME="/home/${DSH_USER}/deepseek-harness-deploy"
export DSH_DATA_HOME="/home/${DSH_USER}/.local/share/deepseek-harness"
export DSH_WORKSPACE="/home/${DSH_USER}/deepseek-workspace"
目录用途如下:
~/deepseek-harness-deploy/
├── app/                 # 固定版本的 npm/pnpm 应用
├── vendor/socat/        # 可选:不使用 sudo 时存放用户态 socat
├── patch-runtime.py     # 更新后重新应用兼容修改
├── manage.sh            # 服务管理脚本
└── README.md

~/.local/share/deepseek-harness/  # Harness 配置、凭据和会话数据
~/deepseek-workspace/             # Agent 默认工作区
1. 检查 Node.js 和端口
node --version
corepack --version
corepack pnpm --version
ss -ltnp '( sport = :3080 )'
Node.js 应符合 DeepSeek Harness 当前要求。本文部署时使用的是 Node.js 22。
如果3080 已被其他服务占用,换一个端口,并同步修改后面的 systemd、socat 和 trusted-host 配置。
还可以实际绑定一次端口,确认它可用:
python3 - <<'PY'
import socket
s = socket.socket()
s.bind(('127.0.0.1', 3080))
print('127.0.0.1:3080 可用')
s.close()
PY
2. 安装固定版本的 DeepSeek Harness
先创建目录:
mkdir -p "$DSH_DEPLOY_HOME/app" "$DSH_DATA_HOME" "$DSH_WORKSPACE"
chmod 700 "$DSH_DATA_HOME" "$DSH_WORKSPACE"
cd "$DSH_DEPLOY_HOME/app"创建package.json:
{
  "name": "deepseek-harness-deployment",
  "private": true,
  "version": "1.0.0",
  "dependencies": {
    "@deepseek-ai/dsh": "0.1.0-rc.6"
  }
}
安装依赖:
corepack pnpm install --prod --ignore-scripts验证 CLI:
DSH_HOME="$DSH_DATA_HOME" ./node_modules/.bin/dsh --version
DSH_HOME="$DSH_DATA_HOME" ./node_modules/.bin/dsh web --help
node-pty 原生模块问题
如果启动时看到类似错误:
Failed to load native module: pty.node
Cannot find module './prebuilds/linux-x64//pty.node'说明安装时跳过了node-pty 的原生构建。找到实际包目录:
cd "$DSH_DEPLOY_HOME/app"
find node_modules/.pnpm -maxdepth 1 -type d -name 'node-pty@*'进入输出目录下的node_modules/node-pty,执行安装或构建:
cd node_modules/.pnpm/node-pty@*/node_modules/node-pty
npm install
某些环境下,最后的 TypeScriptprepare 步骤可能失败,但前面的node-gyp 已经成功生成build/Release/pty.node。可以这样验证:
test -f build/Release/pty.node && echo "pty.node 已生成"
node -e "const p=require('./'); console.log(typeof p.spawn)"第二条命令输出function,说明运行时需要的原生模块已经可以加载。
3. 创建 Harness 的用户级 systemd 服务
创建文件:
~/.config/systemd/user/deepseek-harness.service内容如下,注意替换用户名和 IP:
[Unit]
Description=DeepSeek Harness Web UI
After=network-online.target
Wants=network-online.target

[Service]
Type=simple
WorkingDirectory=/home/LINUX_USERNAME/deepseek-workspace
Environment=DSH_HOME=/home/LINUX_USERNAME/.local/share/deepseek-harness
Environment=DSH_TELEMETRY_DISABLED=1
Environment=NODE_ENV=production
Environment=PATH=/home/LINUX_USERNAME/.local/bin:/usr/local/bin:/usr/bin:/bin
ExecStart=/home/LINUX_USERNAME/deepseek-harness-deploy/app/node_modules/.bin/dsh web --host 127.0.0.1 --port 3080 --trusted-host LAN_IP_ADDRESS:3080
Restart=on-failure
RestartSec=5
TimeoutStopSec=10
NoNewPrivileges=true
PrivateTmp=true

[Install]
WantedBy=default.target
这里有几个细节:
- Harness 仍然只监听
127.0.0.1,不直接改成0.0.0.0。 --trusted-host LAN_IP_ADDRESS:3080允许 Host/Origin 安全检查接受这个局域网入口。DSH_TELEMETRY_DISABLED=1明确关闭遥测。- systemd 用户服务通常不会继承交互式 Shell 的 PATH,所以要把 Node.js 所在目录写进
Environment=PATH=...。
检查并启动:
systemd-analyze --user verify ~/.config/systemd/user/deepseek-harness.service
systemctl --user daemon-reload
systemctl --user enable --now deepseek-harness.service
验证状态:
systemctl --user status deepseek-harness.service
ss -ltnp '( sport = :3080 )'
curl -I http://127.0.0.1:3080/
此时应看到 Node.js 只监听:
127.0.0.1:3080如果想让用户退出 SSH 后服务仍然运行,需要启用 linger:
sudo loginctl enable-linger "$USER"
loginctl show-user "$USER" -p Linger
4. 使用 socat 暴露局域网入口
方式一:通过系统包安装
Ubuntu/Debian:
sudo apt update
sudo apt install -y socat
此时 socat 一般位于/usr/bin/socat。
方式二:不使用 sudo,解包到用户目录
如果当前用户没有 Docker 或 apt 安装权限,可以只下载 deb 并解包:
mkdir -p "$DSH_DEPLOY_HOME/vendor/socat"
cd /tmp
apt-get download socat
dpkg-deb -x /tmp/socat_*.deb "$DSH_DEPLOY_HOME/vendor/socat"
"$DSH_DEPLOY_HOME/vendor/socat/usr/bin/socat" -V
创建用户级服务:
~/.config/systemd/user/deepseek-harness-proxy.service如果使用用户目录中的 socat:
[Unit]
Description=DeepSeek Harness LAN proxy (socat)
After=network-online.target deepseek-harness.service
Wants=network-online.target
Requires=deepseek-harness.service

[Service]
Type=simple
ExecStart=/home/LINUX_USERNAME/deepseek-harness-deploy/vendor/socat/usr/bin/socat TCP4-LISTEN:3080,bind=LAN_IP_ADDRESS,reuseaddr,fork TCP4:127.0.0.1:3080
Restart=on-failure
RestartSec=3
NoNewPrivileges=true
PrivateTmp=true

[Install]
WantedBy=default.target
如果使用系统安装的 socat,把ExecStart 改成:
ExecStart=/usr/bin/socat TCP4-LISTEN:3080,bind=LAN_IP_ADDRESS,reuseaddr,fork TCP4:127.0.0.1:3080启动代理:
systemd-analyze --user verify ~/.config/systemd/user/deepseek-harness-proxy.service
systemctl --user daemon-reload
systemctl --user enable --now deepseek-harness-proxy.service
检查监听地址:
ss -ltnp '( sport = :3080 )'正常情况下会同时看到:
127.0.0.1:3080   node
LAN_IP_ADDRESS:3080   socat
局域网电脑现在可以打开:
http://LAN_IP_ADDRESS:30805. 修复crypto.randomUUID is not a function
局域网 HTTP 访问时,模型设置页可能报错:
加载提供方目录失败: crypto.randomUUID is not a function原因不是 Node.js 版本,而是浏览器安全上下文规则。crypto.randomUUID() 只在 HTTPS 或 localhost 这类安全上下文中提供:
http://127.0.0.1:3080可以使用;http://LAN_IP_ADDRESS:3080属于普通局域网 HTTP,浏览器可能不提供该函数。
解决办法是在 Harness 主前端脚本加载前加入 UUID v4 兼容脚本。兼容实现仍使用浏览器的crypto.getRandomValues(),不是Math.random()。
创建patch-runtime.py:
#!/usr/bin/env python3
from pathlib import Path
import sys

APP = Path("/home/LINUX_USERNAME/deepseek-harness-deploy/app")

frontend_matches = list(APP.glob(
    "node_modules/.pnpm/@deepseek-ai+dsh-web-frontend@*/"
    "node_modules/@deepseek-ai/dsh-web-frontend/dist"
))
if len(frontend_matches) != 1:
    print(f"Expected one frontend dist, found {len(frontend_matches)}", file=sys.stderr)
    raise SystemExit(1)

dist = frontend_matches[0]
index = dist / "index.html"
polyfill = dist / "randomuuid-polyfill.js"

polyfill.write_text(r"""// LAN HTTP compatibility for Web Crypto randomUUID.
if (typeof globalThis.crypto === 'object' &&
    typeof globalThis.crypto.randomUUID !== 'function') {
  Object.defineProperty(globalThis.crypto, 'randomUUID', {
    configurable: true,
    value() {
      const bytes = new Uint8Array(16);
      globalThis.crypto.getRandomValues(bytes);
      bytes[6] = (bytes[6] & 0x0f) | 0x40;
      bytes[8] = (bytes[8] & 0x3f) | 0x80;
      const hex = Array.from(
        bytes,
        b => b.toString(16).padStart(2, '0'),
      );
      return `${hex.slice(0, 4).join('')}-${hex.slice(4, 6).join('')}` +
        `-${hex.slice(6, 8).join('')}-${hex.slice(8, 10).join('')}` +
        `-${hex.slice(10).join('')}`;
    },
  });
}
""", encoding="utf-8")

html = index.read_text(encoding="utf-8")
tag = '    <script src="/randomuuid-polyfill.js"></script>\n'
if tag not in html:
    marker = '    <script type="module"'
    if marker not in html:
        raise SystemExit("Frontend module script marker not found")
    html = html.replace(marker, tag + marker, 1)
    index.write_text(html, encoding="utf-8")

print(f"Patched frontend: {dist}")
执行:
python3 "$DSH_DEPLOY_HOME/patch-runtime.py"
systemctl --user restart deepseek-harness.service
验证脚本已经注入:
curl -fsS http://127.0.0.1:3080/ | grep randomuuid-polyfill
curl -fsS http://127.0.0.1:3080/randomuuid-polyfill.js | head
浏览器需要执行一次强制刷新:
- Windows/Linux:
Ctrl + Shift + R - macOS:
Command + Shift + R
6. 修复模型配置页的 HTTP 403
修复 UUID 后,模型配置页还可能报错:
加载提供方目录失败:
transport failure for /api/settings.describe: HTTP 403
这是 DeepSeek Harness 的另一层安全设计。--trusted-host 只让普通 API 接受局域网 Host,它不会开放配置平面。
在0.1.0-rc.6 中,以下方法被列入PRIVILEGED_METHODS,并再次使用空的 trusted-host 列表检查,因此只允许 localhost:
agentPreset.read
agentPreset.copy
agentPreset.openDocument
agentPreset.remove
host.pickDirectory
host.openPath
settings.describe
settings.openDocument
settings.update
settings.replace
settings.mutate
credentials.describe
credentials.set
credentials.unset
llm.discoverModels
真正造成 403 的已构建代码类似:
PRIVILEGED_METHODS.has(method) &&
!isTrustedApiRequest(request, [])如果你明确接受家庭局域网访问风险,可以把空数组改为已经配置的trustedHosts:
PRIVILEGED_METHODS.has(method) &&
!isTrustedApiRequest(request, trustedHosts)
这样并没有删除整个 Host/Origin 安全检查。请求仍然必须来自--trusted-host 声明的地址,但该地址也可以调用设置和凭据管理接口。
把以下逻辑加入前面的patch-runtime.py,放在前端兼容处理之前或之后均可:
connection_matches = list(APP.glob(
    "node_modules/.pnpm/@deepseek-ai+dsh-client-connection@*/"
    "node_modules/@deepseek-ai/dsh-client-connection/lib/index.js"
))
if len(connection_matches) != 1:
    print(
        f"Expected one connection bundle, found {len(connection_matches)}",
        file=sys.stderr,
    )
    raise SystemExit(1)

connection = connection_matches[0]
text = connection.read_text(encoding="utf-8")

old_guard = (
    'PRIVILEGED_METHODS.has(method) && '
    '!isTrustedApiRequest(request, [])'
)
new_guard = (
    'PRIVILEGED_METHODS.has(method) && '
    '!isTrustedApiRequest(request, trustedHosts)'
)

if old_guard in text:
    connection.write_text(
        text.replace(old_guard, new_guard, 1),
        encoding="utf-8",
    )
elif new_guard not in text:
    print("Privileged-method guard not found", file=sys.stderr)
    raise SystemExit(1)
执行补丁并重启:
python3 "$DSH_DEPLOY_HOME/patch-runtime.py"
systemctl --user restart deepseek-harness.service deepseek-harness-proxy.service
7. 验证局域网设置接口
只看到网页并不代表管理接口已经可用。最好直接请求settings.describe。
创建请求体:
python3 - <<'PY'
import json
payload = {
    "type": "client-request",
    "rpcId": "lan-test-settings",
    "method": "settings.describe",
    "payload": {},
}
with open('/tmp/dsh-settings.json', 'w') as f:
    json.dump(payload, f)
PY
从局域网入口发起请求:
curl -sS \
  -X POST \
  -H 'Content-Type: application/json' \
  --data-binary @/tmp/dsh-settings.json \
  http://LAN_IP_ADDRESS:3080/api/settings.describe
成功响应中应该包含:
{
  "type": "server-response",
  "rpcId": "lan-test-settings",
  "result": {
    "ok": true,
    "value": {
      "writable": true,
      "namespaces": []
    }
  }
}
namespaces 实际会包含多个配置项。重点是 HTTP 状态为 200,且result.ok 为true。
8. 添加服务管理脚本
可以创建manage.sh:
#!/usr/bin/env bash
set -Eeuo pipefail

SERVICE=deepseek-harness.service
PROXY=deepseek-harness-proxy.service
DEPLOY_HOME=/home/LINUX_USERNAME/deepseek-harness-deploy

case "${1:-status}" in
  start)
    systemctl --user start "$SERVICE" "$PROXY"
    ;;
  stop)
    systemctl --user stop "$PROXY" "$SERVICE"
    ;;
  restart)
    systemctl --user restart "$SERVICE" "$PROXY"
    ;;
  status)
    systemctl --user --no-pager --full status "$SERVICE" "$PROXY"
    ;;
  logs)
    journalctl --user -u "$SERVICE" -u "$PROXY" -f -n 200
    ;;
  enable)
    systemctl --user enable --now "$SERVICE" "$PROXY"
    ;;
  disable)
    systemctl --user disable --now "$PROXY" "$SERVICE"
    ;;
  update)
    cd "$DEPLOY_HOME/app"
    corepack pnpm update @deepseek-ai/dsh --prod --ignore-scripts
    python3 "$DEPLOY_HOME/patch-runtime.py"
    systemctl --user restart "$SERVICE" "$PROXY"
    ;;
  *)
    echo "Usage: $0 {start|stop|restart|status|logs|enable|disable|update}" >&2
    exit 2
    ;;
esac
加上执行权限:
chmod 750 "$DSH_DEPLOY_HOME/manage.sh"以后可以这样管理:
cd "$DSH_DEPLOY_HOME"
./manage.sh status
./manage.sh logs
./manage.sh restart
./manage.sh update
更新命令必须在 pnpm 更新之后重新执行补丁,因为node_modules 中的已构建文件可能被覆盖。
9. 防火墙建议
如果服务器启用了 UFW,只允许家庭网段访问:
sudo ufw allow from LAN_CIDR to LAN_IP_ADDRESS port 3080 proto tcp comment 'DeepSeek Harness LAN'不要使用下面这种全网开放方式:
# 不推荐
sudo ufw allow 3080/tcp还要检查路由器,确认没有为3080 配置公网端口映射、UPnP 映射或 DMZ。
10. 常见问题
页面能打开,但模型配置页报crypto.randomUUID 错误
原因是局域网 HTTP 不属于浏览器安全上下文。注入基于crypto.getRandomValues() 的 UUID v4 兼容脚本,并强制刷新浏览器。
页面能打开,但settings.describe 返回 403
--trusted-host 已通过第一层 Host 检查,但设置和凭据接口仍被官方固定为 loopback-only。需要使用 SSH 隧道,或者明确接受风险后修改PRIVILEGED_METHODS 的第二层检查。
systemd 日志显示node: not found
用户级 systemd 没有继承交互式 Shell 的 PATH。把 Node.js 所在目录加入服务的:
Environment=PATH=/home/LINUX_USERNAME/.local/bin:/usr/local/bin:/usr/bin:/bin查找 Node.js 路径:
command -v node日志显示找不到pty.node
构建node-pty 的原生模块,并确认:
test -f build/Release/pty.node
node -e "const p=require('./'); console.log(typeof p.spawn)"
升级后问题重新出现
升级覆盖了node_modules 中的已构建文件。重新执行:
python3 "$DSH_DEPLOY_HOME/patch-runtime.py"
systemctl --user restart deepseek-harness.service deepseek-harness-proxy.service如果脚本提示找不到目标字符串,说明新版代码结构发生了变化。不要盲目替换,先在新的dsh-client-connection/lib/index.js 中重新确认权限检查逻辑。
局域网入口打不开
按顺序检查:
systemctl --user status deepseek-harness.service
systemctl --user status deepseek-harness-proxy.service
ss -ltnp '( sport = :3080 )'
curl -I http://127.0.0.1:3080/
curl -I http://LAN_IP_ADDRESS:3080/
最终结构
部署完成后的访问链路是:
局域网浏览器
    │
    │ http://LAN_IP_ADDRESS:3080
    ▼
socat
    │
    │ TCP 转发
    ▼
DeepSeek Harness
127.0.0.1:3080
这里没有把 Harness 本身改成监听所有网卡。socat 只绑定指定的局域网 IP,Harness 继续留在 loopback。前端补丁解决非安全上下文下的 UUID 问题,Host 端补丁则允许已声明的 trusted-host 使用配置和凭据管理接口。
这套方案能满足家庭实验环境下的直接访问需求,但它不是带登录认证的生产部署。只要设备能访问LAN_IP_ADDRESS:3080,就可能使用 Agent、修改模型配置和凭据。更严格的环境应使用 SSH 隧道,或者在前面增加 HTTPS、身份认证和访问控制,而不是直接开放管理面。